
BURNT HOUSE / STUDIO NOTES / CUBASE PRO 16
A DAW session is a working environment, not an archive of every sound you have ever tried. When the arrangement is moving, you should be able to find the kick, mute the bass, open the vocal chain, compare a reference and print a rough mix without losing the idea that brought you into the studio. A good Cubase workflow is built around that simple principle: remove friction without turning music-making into admin.
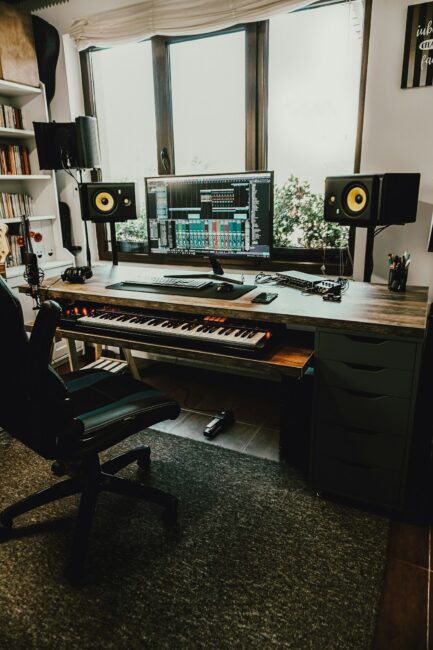
Cubase Pro 16 gives producers some useful new ways to work, but new features do not automatically create a better workflow. Instrument Stacks can simplify layered instruments; the expanded send system gives larger mixes more routing options; the redesigned Settings workspace makes setup easier to navigate; and the improved ASIO-Guard options can help demanding projects run more smoothly. The real question is where these tools belong in an everyday session.
Build a template around decisions you repeat
The first mistake with templates is trying to build the ultimate template. Producers load every favourite synth, every drum instrument, several reverbs, multiple compressors and a collection of tracks they might use one day. The project opens with a long list of choices before a single musical idea exists.
Instead, start with the decisions you repeat in almost every session. Set the sample rate and recording format you normally use. Create a small number of clearly named groups. Add only the effects returns you reach for regularly. Prepare a reference channel and a simple marker structure. Leave instrument tracks empty unless a particular instrument is genuinely part of your starting point.
It can be useful to keep separate templates for different jobs:
- Beat or electronic production: drum and percussion groups, bass, music, a few creative sends and a reference channel.
- Vocal production: lead, doubles, harmonies and ad-libs routed to a vocal group, with dedicated delay and reverb returns.
- Recording: named input tracks, sensible monitoring, cue mixes and a clear record path.
- Mixing: imported audio organised by instrument family, reference routing, mix bus and print tracks.
Keep the template light enough to open quickly. Save a new version only after you have used the previous one on several real projects and can identify what is missing. A template should evolve from experience, not from an afternoon spent imagining every possible session.
Make the Project window tell the truth
Track names should describe what a sound is doing in the arrangement. “Audio 27” tells you almost nothing. “Kick Top”, “Kick Sub”, “Main Bass”, “Bass Texture”, “Lead Vox” and “Vox Throws” tell you what you are looking at before you press play.
Use a naming convention that survives a project becoming complicated. For layered drums, keep related sounds next to each other and name the role as well as the layer. For vocals, distinguish the main performance from doubles, harmonies, ad-libs and printed effects. For synths, name the musical job rather than the plugin: “Hook Lead” is more useful than “Serum 2 Instance 04”.
Colour is useful as a second layer of information. Choose a small palette and apply it consistently: drums one colour family, bass another, musical instruments another, vocals another, and effects or reference tracks something distinct. Avoid making every track a different colour. If colour is doing all the organisational work, the session becomes difficult to understand when viewed on another screen or by another engineer.
Use folder tracks to manage visual complexity, but do not bury important tracks in a maze of folders. A folder should represent a meaningful group, not simply hide a long track list. Collapse it when you are arranging; expand it when you are editing or mixing.
Route for control, not for decoration
Routing should make a decision easier. A drum group lets you change the overall drum balance or apply shared processing. A vocal group gives you one place to automate the vocal level or add gentle bus processing. FX channels make shared reverbs and delays easier to manage. Beyond that, every extra layer should have a reason.
A practical starting layout might look like this:
- Individual drum tracks → Drum Group
- Bass layers → Bass Group
- Synths, keys, guitars and samples → Music Group
- Lead, doubles, harmonies and ad-libs → Vocal Group
- All main groups → Mix Bus
- Reverbs and delays → FX Channels, returning to the appropriate mix destination
There is no rule that every production must use exactly this structure. A sparse acoustic recording may not need a separate bass group; a dense electronic track may need several drum subgroups. The point is to create a signal path you can explain. If you cannot tell where a track is going, or why it is passing through a particular channel, simplify it.
Cubase 16 increases the maximum number of audio sends per channel to sixteen. That is useful for complex sessions, parallel processing, multiple ambience choices and sidechain destinations. It is not a reason to create sixteen sends on every track. Start with the few destinations you actually use, name them by purpose and keep the send list readable. More routing capacity is valuable when a mix needs it; unused routing is just another place to make a mistake.

Use Instrument Stacks when layers behave like one instrument
One of the most practical additions in Cubase 16 Pro and Artist is Instrument Stacks. They allow multiple VST instruments, Sampler Tracks and Drum Tracks to be played from one stack, with individual layer settings such as key and velocity ranges. Steinberg documents support for up to eight layers, and stacks can be saved as multi-track presets.
Think about a layered synth sound: a short transient for definition, a wide mid-range layer for character and a quieter sub layer for weight. Previously, you might build this with separate tracks and MIDI routing. An Instrument Stack can make the group behave more like one playable instrument while retaining control over its component layers.
That does not mean every layered sound belongs in a stack. Keep layers separate when they need independent arrangement, different MIDI performances or substantial editing. Use a stack when the parts are really components of one sound and you want to play or edit them together. The distinction is musical: are these separate parts in the arrangement, or are they ingredients in one instrument?
Try building a stack with three contrasting roles rather than three similar presets. For example, combine a plucky attack, a sustained wavetable layer and a filtered noise texture. Set velocity ranges so the layers respond differently to performance, then adjust their levels and filtering until the sound has movement. Save the stack only when it is useful beyond the current track.
Keep creative effects separate from corrective processing
Shared FX channels are particularly useful when several tracks need to inhabit the same space. A short room or plate can help drums and instruments feel connected; a tempo delay can create rhythmic movement; a longer reverb can be reserved for occasional vocal or synth throws.
Do not send everything to the same reverb simply because it is available. Different sources may need different pre-delay, decay time or filtering. Low frequencies can quickly build up in long reverbs, so consider filtering the return rather than automatically cutting the source. Automate sends when the arrangement calls for a moment of space, rather than leaving every sound permanently washed out.
Parallel processing is another good reason to use a dedicated destination. Send a drum group to a compressed return and blend it quietly under the dry signal. The return should add density or sustain without destroying the transient of the original. Level-match when comparing; a louder parallel blend can seem more exciting even when it is simply less controlled.
Use markers to manage the musical argument
A marker track is not just a navigation aid. It helps you see whether the arrangement develops. Label the main sections, but also mark important transitions: the first entrance of the bass, a drop in the drums, a vocal break, a breakdown or the point where a new counter-melody appears.
When a track feels too long, markers make it easier to compare the second verse with the first, or to identify a chorus that repeats without changing. Try listening to the arrangement section by section and ask what changes for the listener. If the answer is “nothing”, the section may need a new element, a subtraction, a variation or a shorter duration.
For electronic music, markers can help you compare energy across an intro, build, drop and breakdown. For songs, they make alternate arrangements and radio edits easier to manage. Name sections clearly enough that someone opening the project for the first time can follow its structure.
Keep reference tracks outside your processing
A reference track is useful only if you can compare it fairly. Route it so it does not pass through your mix bus processing, loudness chain or master effects. Keep it easy to mute and make sure it is not accidentally included in your final export.
Level-match before making decisions. A commercial master may be louder, denser and more limited than your working mix. If you compare them at different loudness, you risk adding too much compression or limiting simply because the reference is louder. Turn the reference down to a similar perceived level and compare the things that matter: low-end balance, vocal position, brightness, width, transient impact and arrangement density.
Use more than one reference when possible. One track might have the right low end, another the right vocal space, and a third the right sense of width. No single record is a universal target. References are evidence for a decision, not instructions to copy another mix.
Manage CPU before the session becomes unstable
Large sessions can become difficult to play back when many virtual instruments and plug-ins are active. Before freezing or bouncing everything, identify what is actually consuming resources. A single complex instrument or oversampling processor can matter more than dozens of simple EQs.
Use instrument or track rendering when a part is finished and does not need constant real-time editing. Keep the original MIDI and instrument settings where possible, so you can return to the sound later. Print creative effects when they are part of the performance or sound design, but retain a version that allows you to change the balance if the arrangement develops.
Cubase 16 extends ASIO-Guard’s available pre-processing buffer options, which can provide additional headroom in demanding projects. It is not a substitute for sensible session management, a correctly configured audio interface or checking plug-in compatibility. If playback crackles, test the project methodically: bypass a suspected processor, check the audio interface buffer, inspect heavy instruments and see whether a particular track is causing the problem.
Make saving and delivery part of the workflow
Use version names that explain what changed. “TrackName_v07_after_vocal_edit” is more useful than “final final 2”. Before major edits, save a new version. Keep backups somewhere other than the same working drive, because a project folder cannot protect itself against drive failure or accidental deletion.
When handing a project to another producer or engineer, collect the audio files and check that the session opens on a different system. Remove unused takes and duplicate files only when you are certain they are no longer needed. Include a rough mix, tempo, sample rate and a short note describing any unusual routing or external hardware.
For stems, agree the format before exporting: sample rate, bit depth, start and end points, naming convention, and whether effects are printed. Exporting every track from bar one to the same end point makes alignment easier. Include both processed and dry versions when the recipient needs flexibility, and label them clearly.
A practical Cubase Pro 16 session checklist
- Set the project sample rate, tempo and recording format.
- Save the project into a clearly named folder before recording or importing audio.
- Create only the groups and FX returns the production needs.
- Name and colour tracks consistently as soon as their role is clear.
- Use Instrument Stacks for layered sounds that behave as one playable instrument.
- Keep reference audio outside the mix processing and level-match comparisons.
- Use markers to make the arrangement easy to navigate and assess.
- Check CPU-heavy instruments and processors before playback becomes unreliable.
- Save a new version before major edits and keep an external backup.
- Check exports and project handoff files before calling the session finished.
Explore the Cubase 16 tools in more detail
Steinberg’s official Cubase 16 feature overview and Cubase 16 release notes explain the version-specific changes. The Instrument Stacks manual is particularly useful when setting up layered instruments.
For more production-specific reading, continue with the Burnt House guides to Cubase setup and audio performance, layering sounds with Instrument Stacks, working with Stem Separation and groups, buses and FX returns. For MIDI performance, explore editing and humanising MIDI and the dedicated Strum and Stretch Selection workflow. If the session includes vocals, see the guide to recording and comping vocals in Cubase 16, then use the automation guide to develop the mix.
The best workflow is the one that gets out of the way
A well-organised Cubase session should feel almost invisible. You know where the sounds are, the routing makes sense, the reference is ready, and the project can grow without becoming a maze. Build enough structure to protect the creative process, then stop organising and make the record. The measure of a good template is not how impressive it looks when empty. It is whether it helps you finish better music.